Prerequisites
- X-Cart 5.3 – The plugin is written to work with earlier versions in the X-Cart 5 line, but has not been tested with versions earlier than 5.3.
- SSL installed on your site and active on Checkout pages. This ensures PCI compliance.
- cURL for PHP installed on your site. Most hosting providers already include this in your setup.
- An OmniFund account, and a set of API Access Key pairs to use, generated by visiting Profile > API Access on the OmniFund site.
Manual Installation
- Download the OmniFund X-Cart plugin
- Login to your site’s X-Cart Dashboard
- Click on My Addons on the left navigation menu.
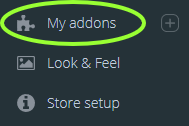 Image Added
- Click the Upload add-on button at the top right
- Click Browse to select the OmniFund X-Cart plugin you downloaded, and then click Install add-on.
- Next, follow instructions on activating and configuring the plugin below.
Activation & Configuration
- Login to your X-Cart Dashboard
- Click on Store Setup in the navigation menu.
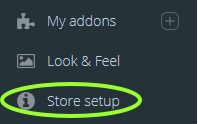 Image Added
- Click on Payment Methods in the menu.
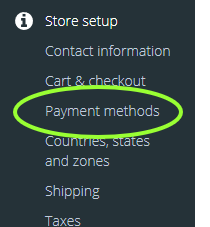 Image Added
- Click on the Add payment method button.
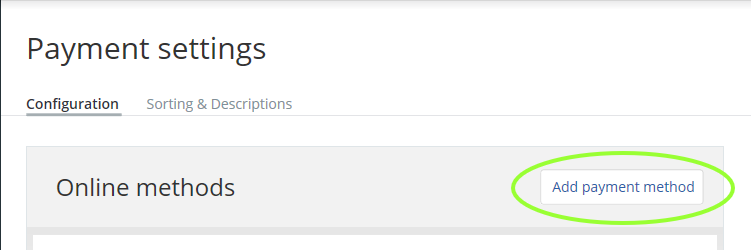 Image Added
- In the dialog that pops up, enter omnifund into the search box and click Search. Two payment methods will be available for you to install. The OmniFund Payments: ACH method allows you to take ACH payments with your OmniFund Account, and the OmniFund Payments: Credit/Debit one allows you to process credit/debit cards through your OmniFund account. Click the Add button next to the method you would like available.
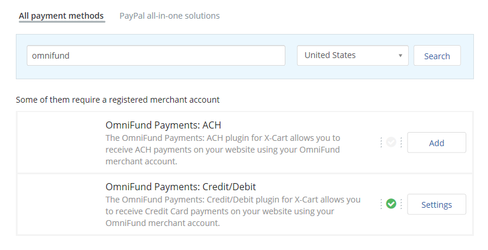 Image Added
- The settings screen for that method will be displayed next. Copy and paste your Access Key and Access Key Secret from your OmniFund account, and then select whether you would like the plugin to operate in Test mode (for testing transactions) or Live mode for processing directly with your OmniFund account. Once finished, click the Save changes button.
Note that your Access Key and Secret are generated under Profile > API Access on the OmniFund site.
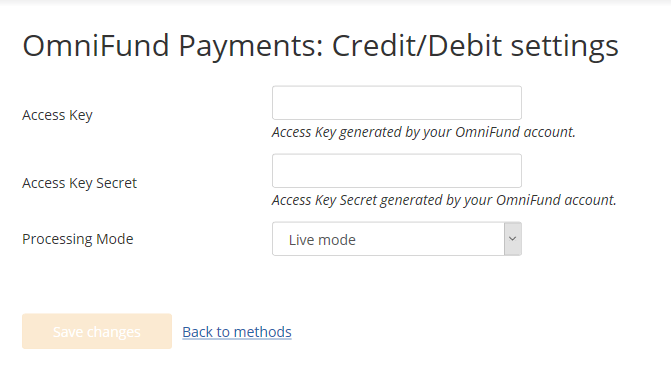 Image Added
- If you wish to add the other payment method for OmniFund, return to step 4, and follow the steps to add the method you did not the first time.
Processing Payments
- Once the payment methods are setup, a customer will be able to enter their payment information when checking out on your online store. After entering their billing and shipping information, they can select their payment method. If you have enabled both payment methods for OmniFund, your customer will see the following selections:
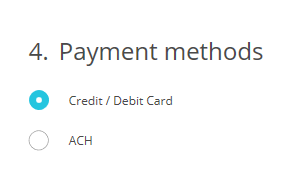 Image Added
- Selecting Credit/Debit Card will present the following payment fields to them:
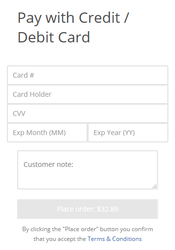 Image Added
- Selecting ACH will present the following payment fields to them:
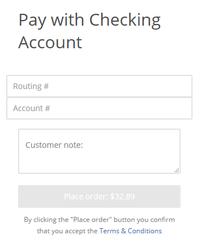 Image Added
- Clicking Place order will process the transaction with your OmniFund account.
{"serverDuration": 277, "requestCorrelationId": "bbd857f6a1dc48f6ac40bb61862b847d"}